A catio is one of the best investments you can make for an indoor cat. These secure outdoor enclosures provide fresh air, sunshine, exercise, and mental stimulation while protecting cats from traffic, predators, disease, and other outdoor hazards.
The good news is that building a catio doesn’t have to be complicated or expensive. With basic tools, careful planning, and the right materials, many cat owners can create a safe and enriching outdoor space over a weekend.
This step-by-step guide will walk you through the process of building a DIY catio that suits your home, budget, and cat’s needs.
Why Build a DIY Catio?
Building your own catio offers several advantages:
- Lower cost than custom-built installations
- Complete design flexibility
- Ability to customize for your space
- Opportunity to add features your cat enjoys
- Satisfaction of creating a personalized environment
Whether you have a backyard, patio, balcony, or small outdoor area, there is a catio design that can work for your situation.
Step 1: Choose the Right Location
The first step is deciding where your catio will be located.
Popular options include:
Window-Connected Catios
These attach directly to an accessible window and allow cats to move freely between the house and enclosure.
Patio Catios
An existing patio can often be enclosed with minimal construction.
Balcony Catios
Apartment dwellers may be able to convert balconies into secure outdoor spaces.
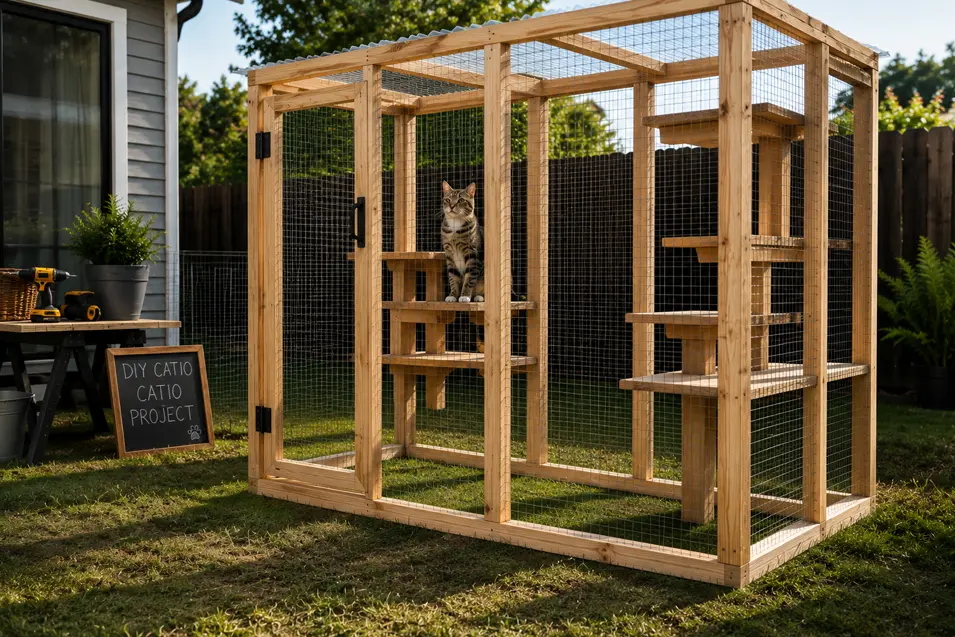
Freestanding Backyard Catios
These larger enclosures provide maximum room for exploration and enrichment.
When choosing a location, consider:
- Accessibility for your cat
- Sun exposure
- Drainage
- Available space
- Ease of maintenance
Step 2: Determine the Size
A catio can be as small or as large as your space allows.
Remember that cats value vertical space as much as floor space.
Even a compact enclosure can feel spacious when it includes:
- Climbing shelves
- Elevated platforms
- Catwalks
- Hammocks
- Observation perches
Whenever possible, build larger than your minimum requirements to allow for future additions.
Step 3: Create a Simple Design Plan
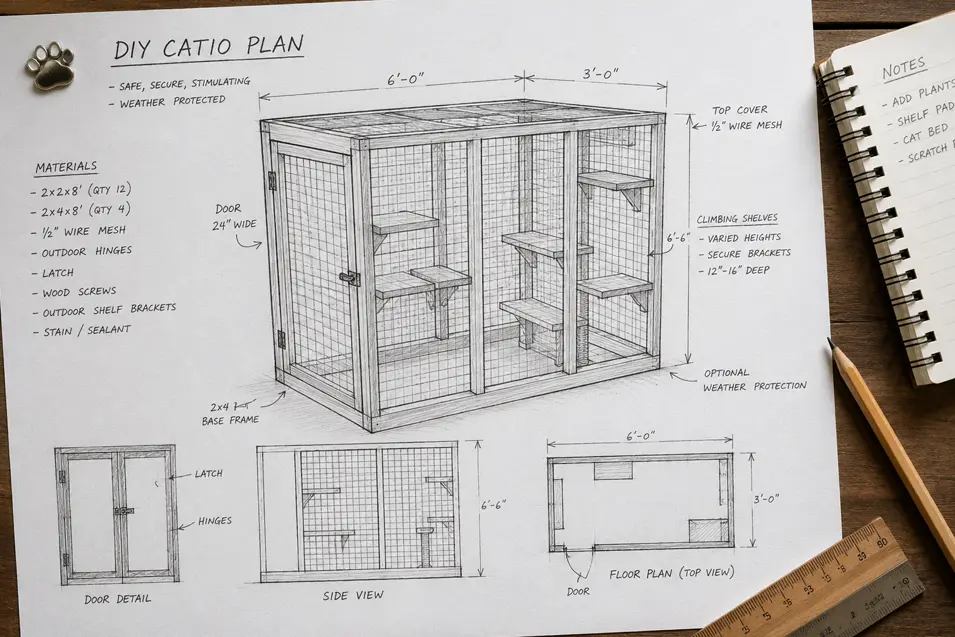
Before purchasing materials, sketch your design.
Your plan should include:
- Overall dimensions
- Door location
- Window or tunnel access points
- Shelf placement
- Roof design
- Resting areas
A simple drawing helps prevent mistakes and reduces wasted materials.
Step 4: Gather Materials and Tools
Common Building Materials
- Pressure-treated lumber or cedar
- Galvanized wire mesh
- Exterior screws
- Hinges
- Latches
- Roofing panels or weather-resistant covering
- Concrete anchors (if needed)
Basic Tools
- Measuring tape
- Drill
- Circular saw
- Level
- Staple gun
- Wire cutters
- Safety equipment
Choose materials designed for outdoor use to maximize durability.
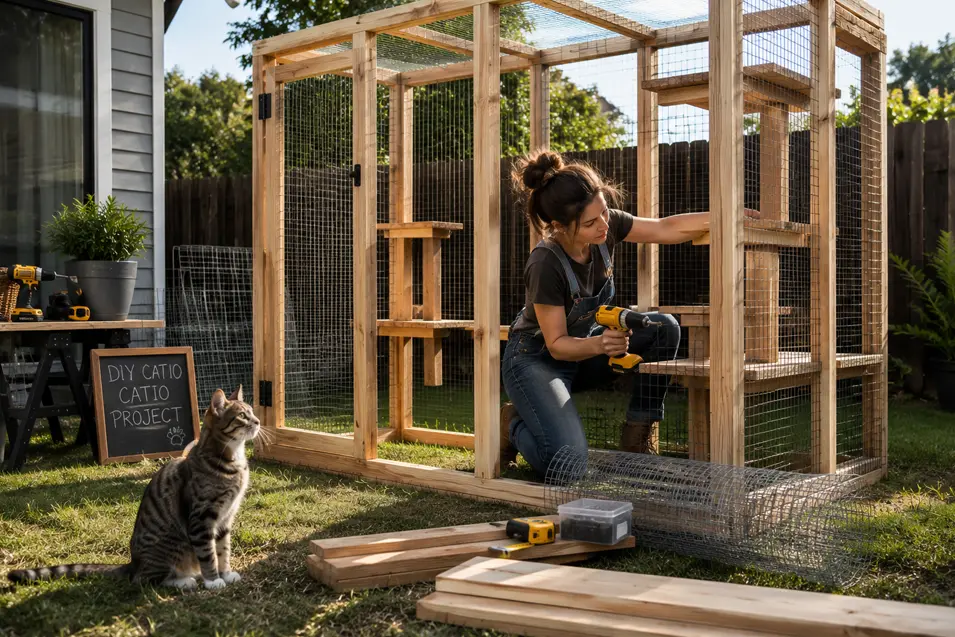
Step 5: Build the Frame
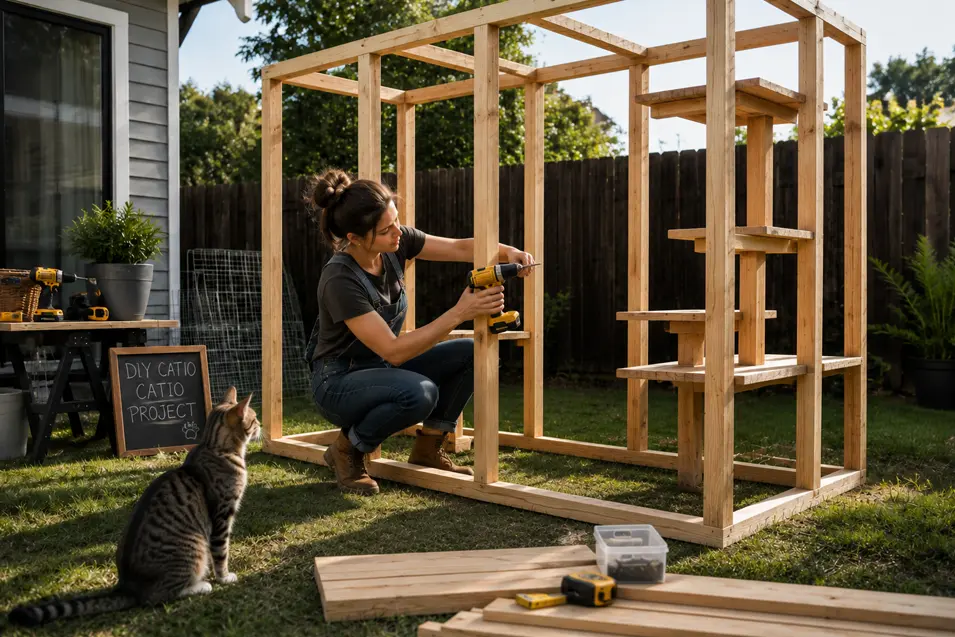
The frame forms the foundation of your catio.
Most DIY catios use a simple rectangular wooden frame.
Construction Tips
- Verify all corners are square.
- Use sturdy screws instead of nails whenever possible.
- Add cross supports for larger structures.
- Secure the frame firmly to the house or ground.
A strong frame improves both safety and longevity.
Step 6: Install the Wire Mesh
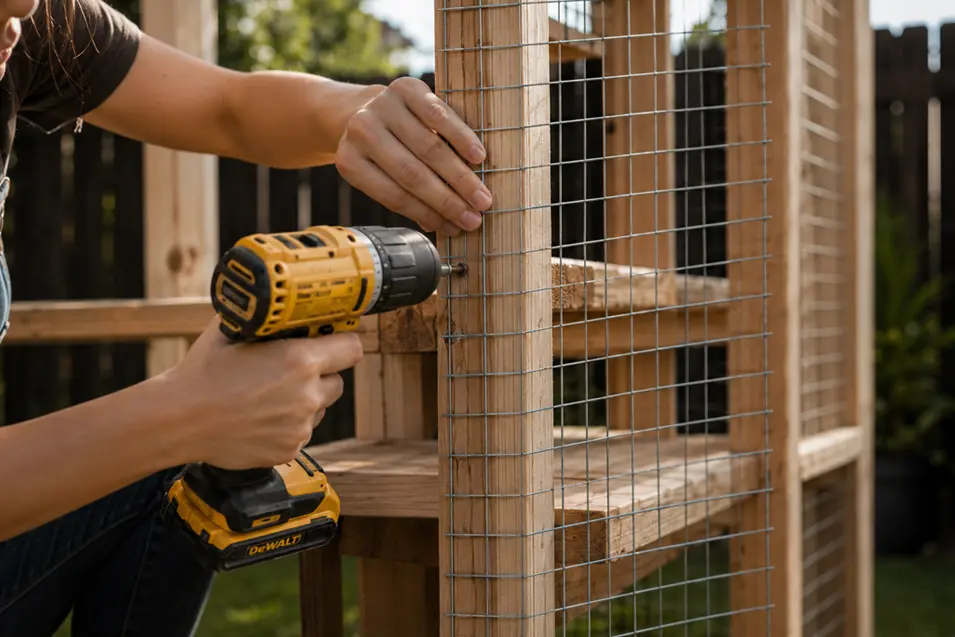
Wire mesh creates the protective barrier that keeps cats safe.
Galvanized wire mesh is often preferred because it is:
- Durable
- Rust-resistant
- Difficult for cats to damage
Attach the mesh securely using staples or screws with washers.
Inspect carefully for:
- Sharp edges
- Gaps
- Loose sections
Pay special attention to corners and door openings.
Step 7: Add a Roof

A roof is essential for safety.
Without one, many cats can climb out of the enclosure.
A roof also provides protection from:
- Rain
- Falling debris
- Birds of prey
- Excessive sun exposure
Popular roofing options include:
- Wire mesh roofing
- Polycarbonate panels
- Corrugated roofing panels
- Shade cloth
Many cat owners combine covered and open sections for flexibility.
Step 8: Install a Secure Access Door
Every catio needs a secure entry point for cleaning and maintenance.
Choose a sturdy door with:
- Strong hinges
- Reliable latches
- Tight-fitting edges
Always test doors thoroughly before allowing your cat access.
Step 9: Add Climbing and Enrichment Features
Once the enclosure is complete, it’s time to make it fun.
Popular Catio Features
Shelves and Platforms
Provide elevated observation areas and maximize usable space.
Cat Trees
Offer climbing opportunities and exercise.
Hammocks
Create comfortable lounging spots.
Scratching Posts
Encourage natural scratching behaviors.
Tunnels
Increase exploration opportunities and connect different sections.
Cat-Safe Plants
Add sensory enrichment with:
- Catnip
- Cat grass
- Wheatgrass
- Spider plants
The more engaging the environment, the more your cat will use it.
Step 10: Perform a Safety Inspection
Before introducing your cat, inspect every part of the enclosure.
Check for:
- Loose mesh
- Sharp edges
- Weak connections
- Escape gaps
- Unstable shelves
- Faulty door latches
Remember that cats are skilled climbers and escape artists.
A thorough inspection helps prevent future problems.
Budget-Friendly DIY Catio Tips
You don’t need a large budget to build a great catio.
Money-saving ideas include:
- Repurposing existing fencing
- Using reclaimed lumber
- Converting an existing porch
- Building in phases
- Purchasing second-hand outdoor furniture
Even a simple enclosure can provide tremendous benefits.
Common DIY Catio Mistakes to Avoid
Skipping the Roof
Many first-time builders underestimate how well cats can climb.
Underestimating Vertical Space
Cats prefer elevated areas whenever possible.
Using Weak Materials
Outdoor structures must withstand weather and daily use.
Forgetting Shade
Cats need protection from excessive heat and direct sunlight.
Ignoring Future Expansion
Leave room for additional shelves, tunnels, or enrichment features.
Enjoying Your New Catio
Building a DIY catio is a rewarding project that can dramatically improve your cat’s quality of life. Whether you create a small window enclosure or a spacious backyard retreat, the result is a safe outdoor environment where your cat can enjoy fresh air, sunshine, exercise, and mental stimulation.
With thoughtful planning and careful construction, your DIY catio can provide years of enjoyment for both you and your feline companion.
Related Reading
Looking for inspiration before you build?
Explore:
- Catio Ideas: Creating a Safe Outdoor Space for Indoor Cats
- Catio Benefits: Why Indoor Cats Need Safe Outdoor Enrichment
- Small Catio Ideas for Apartments, Patios, and Balconies
These guides can help you choose the perfect design and maximize the benefits of your new catio.